Taboola Push user guide
What is a Taboola Push?
Taboola Push is a product within Newsroom to send a browser notification, aka, a web push alert, to a user’s device. These alert-style messages are sent by an editor and are delivered on both desktop and mobile, sliding in at the top or bottom of the screen.
These alerts help publishers to grow audience and increase user loyalty.
In general, Taboola Push notifications:
- Will be delivered if the browser is not actively in use, even if minimized/hidden.
- Cannot be stopped by an ad blocker or end up in a spam folder.
- Will arrive extremely fast, usually in a few seconds.
These messages are fully supported by Chrome, Firefox, Opera, Microsoft Edge, MacOS Safari and Yandex and are beginning to be supported by Safari iOS.
In order to receive them, the user has to opt-in to the transaction. When they visit your website, they are given the option to subscribe to push notifications. If they accept, they will start receiving notifications to that browser on that device.
To unsubscribe, a user can adjust their browser settings, which is generally very straightforward, as below.
Also, normal GDPR and CCPA consent covers all web push activity.
How to send a push message?
There are three ways to send a push message: via a story card in Top Articles, “Push” button in the middle navigation bar of Top Articles and through the Taboola Push page accessed from the left rail.
1. Top Articles story card workflow
An editor can send an alert in as few as three clicks from any story card in Top Articles. This gives the advantage of combining the data and the action. An editor can see an article is trending and immediately move to alert that article.
To send a push message, identify the target article, hover over the article until the push icon appears on the far right, click on the push icon and launch the Taboola Push flyout panel. From that panel, make any edits needed, click the Send Now button and then click Send button to confirm that action. This message will be sent out for immediate delivery, as below.
If the editor wants to schedule the message for a later delivery time/date, select the “Schedule in Publisher Time Zone” checkbox and enter the desired time/date in the pulldowns. Note: The messages will be delivered per the timezone of the publisher not the timezone of the user.
To review, edit or cancel that message, follow the workflow below.
2. Middle navigation bar
To send a push message from the navigation bar, first click on the Push button. This opens the flyout panel where a user can take two actions: review scheduled messages or proceed to send a push message.
A. To send a message, click the “+New Push” button in the top right of the panel. The next page features an open URL interface, allowing a user to send the push message targeting any page. This differs from the story card workflow, where you are limited to only that article. Uses here could include setting the landing page URL in a push message to a homepage or section font, a video page or subdomain article — none of which would be available in the story card workflow. For example, during elections, an editor may want to send out a push alert to “Complete election results” and set the URL to an election data landing page.
Once the URL is selected, it passes through a validator to check for typos and to scrape and pre-populate the OG:image and OG:title fields. The user can then make any edits and either send immediately or schedule the message.
B. To make changes to a scheduled message, open the flyout panel with push icon on the midpage navigation bar. From the main panel, a user can review which messages are scheduled in reverse chronological order, with the closest to be sent at the top. A user also can filter to find a specific message. To edit or cancel a scheduled message, hover over the timestamp to reveal a edit or trashcan icon and take the desire action. Here below, a user is editing the title and the time, and then saving those changes.
3. Taboola Push page
From the Push icon in the left rail, a user can review all pushes that are scheduled, look at what pushes were recently sent or canceled, or send a push from the “+New Push” button at the top right of the page. The page is divided into two tabs — Scheduled and Completed. Schedule includes pending messages. Completed includes both sent and canceled messages. In addition to reviewing, editing and canceling scheduled and sent pushes, this UI also details what user took each action, providing an audit trail.
Where can I get engagement and user data?
A user can get engagement data on each push and the total user base from the Reports page in the left rail under the vertical bar chart icon. To access the data, click “Run New Report” and navigate to the appropriate extracts. For Taboola Push, there are two types of analytics reports: “Push Notification Report” and “Push Notification User Growth Report”
- The “Push Notification Report” details for each message title, URL, impressions, clicks, CTR and section
- The “Push Notification User Growth Report” details opt-ins, opt-outs and total opt-ins
Each report can be a one-time download or a recurring email. Data is given in bins of 24 hours, 7 days or 30 days. Each report will be delivered in the form of a CSV for easy ingestion and data manipulation. In addition to the email, all reports generated can be accessed and downloaded from this page.
In addition to the Reports page, all Taboola Push-referred traffic will be reflected in all the standard Newsroom dashboards like Top Articles and Yesterday.
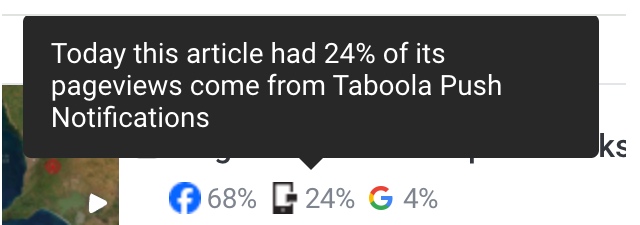
Push traffic will be broken out in the Other referral category, as below:
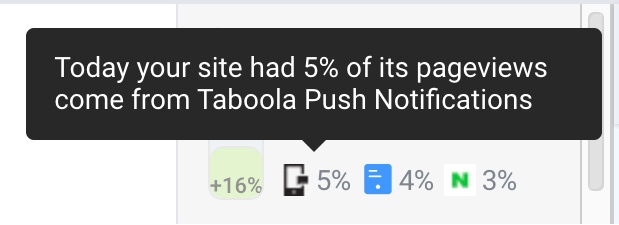
It also will be broken out per article, as below: